How to Seal Chalk Paint Kitchen Cabinets
How to seal chalk paint kitchen cabinets? Getting to seal your kitchen cabinets might be tiresome because you might be confused about the suitable sealer or paint to use that’ll still stay durable to withstand the kitchen stress.
Although getting to know how to seal chalk paint on a kitchen cabinet might seem like a cumbersome task that only professionals can handle, but the good news is that you don’t have to be a professional before you can seal chalk paint. Even an amateur can seal chalk paint.
This is what this article is all about. It contains all you need to know as regards to chalk paint, the necessary steps, the methods of application, the recommended products to use as well as pro-tips that’ll guide you to have well-sealed, shiny kitchen cabinets.
Probably you just got a new house, and you feel like changing the whole cabinet in the kitchen, or the color on your cabinet is already fading, chalk paint is the suitable paint to use for your kitchen cabinets. I’m sure you’re wondering what is so special about chalk paint.
Well, chalk paint is a specially modified paint with no problem attaching to a surface. It is thick, making it easy to cover much surface area, which reduces wastage of paint. Also, chalk paint dries fast, which is a fantastic feature as it makes it easy to apply multiple coats without having to wait for days before it dries.
One more important part about chalk paint is that you don’t necessarily have to go through the stress of prime. Once your surface is clean, you’re free to paint and apply your sealer, and you’re good to go!
All at a Glance
Why use chalk paint?

There is a considerable difference between chalk paint and chalkboard paint. Chalk paint has been uniquely combined with a flat paint with zero issues attaching to any surface type, ruling out the need to stand or prim.
However, there is a need to seal this paint due to its matte finishing. Although Annie Sloan is the original brand producing this paint, many other brands came up with various formulas to make their unique type of chalk paint. Annie Sloan’s Pure White paint comes highly recommended.
This is due to its own very natural white color, which does not contain additional warm or cool tones, making it the most suitable chalk paint for kitchen cabinets.
The white paint gives your kitchen the glow and serenity you want it to possess, and for the fact that you’re painting over your cabinets, you don’t have to worry about the paint flaking or rubbing off on your body because chalk paint is fit for your cabinets.
I’m sure you’re wondering why that is? The cabinets are easily prone to heat from cooking, sharp objects hitting them around the edges and constant wear. It’s necessary to give your cabinets durable and quality painting, which is chalk paint.
Before applying chalk paint, you need to know one of the surface coat most suitable for kitchen cabinets. Before applying on your surface, you need to know some facts about the coat you’re about to use.
To start with, one amazingly unique characteristic of chalk paint is its ability to dry fast. This excellent characteristic makes it very easy to apply multiple coats without having to wait for a very long period for it to dry.
In addition to this, the chalk paint is quite thick. This thickness allows the paint to have maximum effect on the surface. Fewer coats of paint are being used, and more work surfaces are being covered with the level of paint wastage drastically reduced.
Moreover, chalk paint has been specially formulated. Hence, the need to prime is not necessary. Imagine painting over a wooden surface, especially already sealed wood, and getting the usual brownish stains all over, thanks to tannins in the wood. It’s one very frustrating and dissatisfactory feeling.
The good news is, Chalk paint doesn’t allow the tannins of the wood to seep into paints, especially white paints, when applied to already sealed wood. Chalk paint is most suitable for kitchen cabinets made with heavily grained wood.
However, due to the paint’s thickness, it leaves brush marks which means you have to take extra care when using the brush, but you can avoid that if you’re using a spraying method.
While painting over a surface, it is hard to conceal the tannins around areas that have been previously sanded and not yet sealed. You can find such sites around the hardware holes. To counter this, you’ll need to apply more coats of paint, but you can use a primer for more effect.
The thickness of the paint makes it build up quickly, which reduces the proportion of beautifying the edges. You need to note that you cannot brush on chalk paint uniformly, and you have to be careful not to have too thick coats on the drawers and edges of the cabinet doors.
Factors you have to consider before applying chalk paint
Time: When you want to apply, you have to take your time if you’re going to have desirable results as it is a work of patience. Although chalk paint doesn’t need priming, still you have to be calculative while painting because it dries quickly, and you don’t want to have dried unfinished paint on your cabinet.
You can use the spraying method to apply the paint. You might have to thin the paint because it is thick. Spraying is a more effective method of application.
Paint chipping: Chalk paint, when not properly sealed, will eventually start chipping off as a result of wears, exposure to heat, and when in contact with a sharp object, which is why it is necessary to seal the cabinet with a high-quality sealer, this will protect and make the cabinet waterproof and highly durable.
Method of application: Chalk paint is very thick, and you have to consider the way of application you want to adopt before starting your painting. If you’re going to use the brushing method, you might have to be careful with it as it might leave brush stains due to its density.
Read Also: Top 7 Best Paint Sprayer for Cabinets and Trim 2021
However, you might dry sand the brush marks, which doesn’t rule out that you have to take extra care when using the brush, and if you’re considering using the spraying method, you don’t have much problem. You have to wait for the paint to dry in between coats which takes less time than usual.
Steps on how to seal chalk paint kitchen cabinets
The following steps will guide you on how to seal chalk paint on kitchen cabinets using a sprayer or other application methods and eventually to have a smooth, desirable coat on your surface.
Step one: Filling old hardware holes
The first step, which is the most important one, is to fill old hardware holes and to go about that, you have to take off the hardware from the drawers and the doors.
In case you want to use new doors with various attachment point, you’ll have to fill up the holes where the previous doorknobs and drawer pulls used to be.
We’ll recommend plastic wood filler for use when you want to fill the gaps in your cabinets because of its effectiveness as it dries within a period of 15minutes. More so, while working your plastic wood filler, you’ll have to work quick and accurate because it dries faster than you expect.
Step two: Clean the surface of your cabinet
It is also necessary to clean your cabinet before painting it. To clean, you’ll use a degreasing soap and then add in the water, then use a non-scratch abrasive sponge to scrub the cabinet’s surface hard.
Cleaning your cabinet, especially with a degreasing agent, will prevent your wardrobe from having grease dots showing through the chalk paint. After spotless, rinse well and then dry the cabinet.
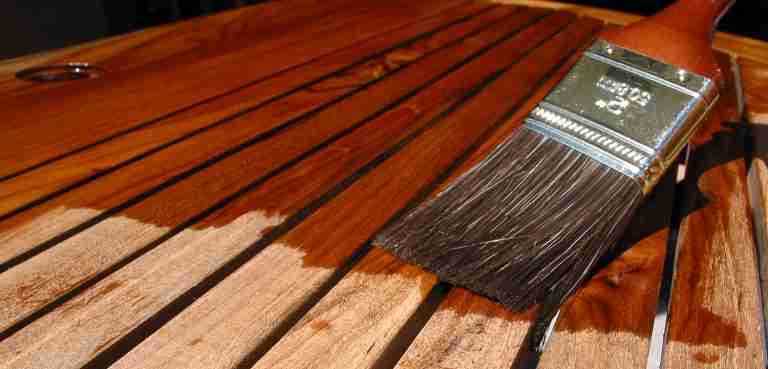
Step three: Apply your paint.
One of the fantastic facts about chalk paint is that you don’t necessarily need to prime. Once your cabinet is clean and dried, apply your paint. Chalk paint is thick, and it dries rapidly, making it easy for you to paint a coat and immediately use another.
Get a high-quality brush and apply the paint in gentle, long and even strokes and make sure you finish a particular area before you move back to another. Although the paint dries fast, it still allows it to dry effectively for at least 3-4 hours.
If the brush’s texture is evident, or you’ve tampered with the sharp and little edges, you can gently dry sand with 600 grit sandpaper. This will leave the surface extremely smooth and shiny.
Step four: Seal
After painting, apply a desirable surface seal. Why? Kitchen cabinets are easily prone to wears and tears due to consistent use and exposure to heat. Using a sealer will protect the surface of the cabinet, making it more durable.
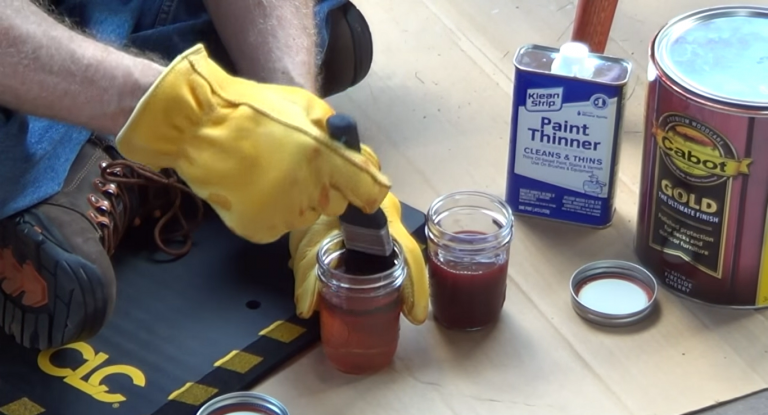
We would’ve recommended polyurethane as the most appropriate seal to use. Still, an oil-based sealer gives a yellow, amber coloration as time goes on, while Polycrylic is a water-based sealer that keeps the cabinet waterproof and durable.
Thus, we are recommending Polycrylic as the suitable sealer to use on your kitchen cabinet. To apply, you can brush a few coats on the surface.
Step five: Replace the doorknobs.
Install all the removed doorknobs, drawer pulls and door hinges and while fixing them, ensure they’re firm enough. You can likewise add a few coats of paint or seal on the knobs to make them shiny.
Pro-tips when sealing with chalk paint
- It’s important to get high-quality materials, starting from the brush you’re to use down to the chalk paint and water-based Polycrylic. This will enhance the desired results.
When applying chalk paint, gently sand in between the coats, including the final coat, before making use of your sealer to avoid having strokes and rough coatings on the surface of the cabinet. - Gently apply the paint in light and even strokes without tampering with the sharp edges and ensure it looks smooth
- The paint dries fast, making it easy to apply multiple coats, still allowing it to dry for a few hours in between coats and ensure it doesn’t have streaks.
- When using the spraying method, make sure the paint is even on the surface.
- Use a plastic wood filler to fill hardware holes.
- Ensure you clean your cabinet using a degreasing detergent. This will get rid of any grease that might interfere with the white color of the paint.
- When you notice the brush marks are evident, use 600-grit sandpaper to dry sand to give you a smooth surface.
- For sealing, use a water-based Polycrylic. This will strengthen the surface and make it durable.
- When applying chalk paint, gently sand in between the coats, including the final coat, before making use of your sealer to avoid having strokes and rough coatings on the surface of the cabinet.
Equipment and materials
- Water-based Polycrylic
- 600-grit sandpaper
- Polyethylene coating chalk paint
- Mineral spirit
- Plastic wood filler
- Degreasing detergent
- Water
- Non-scratch sponge
- Brush
Conclusion – How to Seal Chalk Paint Kitchen Cabinets
Sealing your cabinets with chalk paint is not much of a big deal after all, and it doesn’t necessarily mean you have to be a pro before you seal your cabinet. So far, we’ve discussed everything on chalk paint, as well as the steps on how to seal your kitchen cabinets.
But you need to know that no matter what, even if you follow the steps in detail and you use substandard products, you’ll still end up having a poor quality result. You must use high-quality products, including the brush you’re using for your application.
To start, to seal your kitchen cabinets, you need to fill in old hardware holes with plastic wood filler and then ensure you spotless the surface of your wood with a degreasing detergent. This will enhance a brighter finish without having tiny grease spots showing through the white paint.
Although chalk paint dries fast, still allow each coat to dry for a few hours, this will reduce the chances of you having streaks on the surface. You can dry sand to get your sharp edges back and erase the evident brush marks.
We highly recommend you use polycrylic to seal the chalk paint on the cabinet. It’ll help it to be long-lasting. Regardless, chalk paint is the most suitable coating you can give your kitchen cabinet!
Important Reads: