How Long Should the Deck Stain Dry Before Putting Furniture On It?
Staining your wood deck is not a cumbersome task, and all you have to is follow the necessary steps outlined in this article. Although getting your deck stained is not a problem but letting it cure completely, most people get it wrong, which eventually affects the desired result you want.
Perhaps you want to know all about deck staining. Then you’re at the right place!
Stained decks should be left to dry completely for at least 24 hours before putting furniture on them. This will ensure it is cured completely and won’t affect the newly applied finish.
We will discuss everything about deck stains, including pro-tips that’ll provide an easy staining process for you.
All at a Glance
How long should the deck stain dry before putting furniture on it?

After applying deck stain on decks and patios, it needs to dry completely before allowing furniture on it. Allow it to dry for at least 24 hours before you start walking on it or let the furniture. This will ensure that the deck is completely cured.
Factors that affect a stained deck drying time.
Few factors affect the drying time of stained wood, some of which are outlined below;
- Type of product used
The type of staining product used in your deck will determine how long it’ll take your deck to dry completely and when safe to put furniture on it. There are various products, even though they all serve the general purpose of deck staining. Still, each of those products has a unique way of working. It’s necessary to get the product’s information by reading the manufacturer’s instructions to know how long it will take to dry on your wood pieces. Moreso, following the manufacturers’ guidelines, will help in the proper application of the wood.
- Type of wood
The type of wood also used matters, and it’s an essential factor that needs to be considered. Various woods have a different way they react to stains and chemicals. More so, each wood differs in its pore size, and also, the type of wood in the sense of either you’re working on an old deck, or a new one matters to determine its curing time. In case you want to make a new deck with pressure-treated wood, you need to allow the wood to dry for months before adding stain for it to last longer when it seeps into its pores.
- Weather
The weather conditions also matter. It’s advisable to stain your deck when the weather condition is dry. Humid weather conditions lengthen the curing time. LikewiseLikewiseuring dry weather, there’s always less humidity, which shortens the curing time automatically.
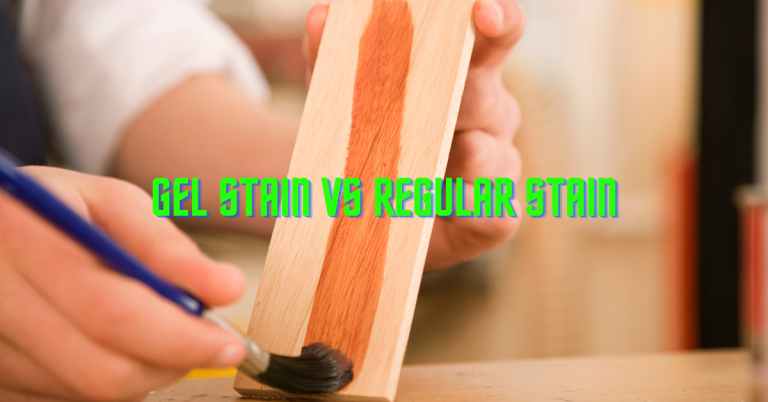
Oil-based stain or water-based stain, which is better?
Many people prefer water-based stain as it is more durable, efficient, and better than the oil-based paint. Water-based stain offers some distinct features, which are advantages that oil-based stains can’t provide. High-quality water-based stains clean up easily with soap and water when compared to oil-based.
It also has better weathering resistance and doesn’t require the new wood to be completely dry before it is applied to it. This is an advantage it has over oil-based stains. More so, it dries more quickly. We’re recommending that you use water-based paint to coat your deck. Decks are best stained with a semi-transparent wood stain that will allow the natural grain of the wood to show through.
Read Also: How many Coats of Primer do you Need on Exterior Wood?
How to apply stain on a wood deck – How long should the deck stain dry before putting furniture on it?
The following steps will guide you on how to apply stain on the wood deck.
Step one: Get your deck ready.
Take your time to get your tools ready, allow new pressure-treated lumber to weather for a few months to dry out before staining, and for the old deck, move out all forms of furniture, water pots, and flowers from its surface to enable easy application.
Step two: Strip the deck of its old stain.
For older decks, the old paints and finishes need to be removed to be useful for the new ones. Leave stain strippers on the surface long enough to break down old finishes and coats before rinsing it off. Apply the stain strippers gently to avoid overspray on no target surfaces.
Step three: Clean the deck
Whether you’re dealing with an old deck that has been extraordinarily weathered or a new one, each needs to be well cleaned before staining. New wood needs to be cleaned to remove mill scale, which is a crushing of the grain that occurs during the milling process.
If it is left uncleaned, it will prevent wood stains from properly penetrating the wood pores. This reduces the stain effectiveness on the wood deck.
Regarding the older deck, environmental factors such as mildew, sunlight, and humidity will have affected the deck, making it look weathered, grey, and warped. Old stains need to be removed before staining. Stain strippers such as sodium percarbonate wood cleaners are used to bare the deck of all it’s remaining finishing.
Stain strippers are useful for cleaning your wood. They’re safe to use and don’t harm plants. Before stripping your wood, you need to check for any buildup of stains.
Perhaps if there’s, then there’s much work at hand at using sodium percarbonate might not be useful as you want it to be. It is advisable to use stain strippers, which are more caustic and will remove the hard buildups.
Then after using strippers, you might notice small spots of stain that didn’t come off while cleaning. To correct this, you’ll need a palm type sander to easily remove the stains after they’re dried.
It’s essential to remove those stains because if left and a new coat are placed on it, those stains will show through the new finish, which reduces the deck’s beautiful outcome.
Step four: Use wood brighteners
Using wood brighteners is an easy and necessary step in the process of deck staining. Although many people overlook this step, it’s imperative as a result of the effects it has on the wood. Apart from having a significant impact on the wood, it is easy to apply and works in such a way that it;
- Opens up the surface of the wood to increase penetration into the wood.
- Neutralizes the stain strippers used.
- Restores the appearance of old, weathered wood to look brand new
- To apply, all you have to do is spray them on, wait for a few minutes, then rinse them off.
Step five: Rinse thoroughly
After applying your brightener, rinse the whole deck.
Step six: Apply your stain.
Now that the deck is ready, clean, and dry, you can apply the stain. Before applying your paint, endeavor to read the manufacturer’s instructions to know the number of coats of paint to use, how long to wait in between the coats, and how long to leave it to cure. This will be specified in the product label.
Step seven: Work your paintbrush on the wood.
You can apply your deck stains in various ways, and mostly a pump-up garden sprayer and rollers are the two methods of application used. Still, no matter your method of application, always keep a paintbrush at hand. A paintbrush will work the stain deep into the pores of aboard.
The paintbrush works effectively so that the force and friction it exerts on the surface will make the wood absorb more stain. So if you’re spraying or rolling the timber, always back brush while the stain is still wet. This will help the deck to absorb more stain.
Step eight: Allow drying
After staining, let your deck dry well before you start using it. The deck has to cure totally before you begin placing furniture on it. Let it dry for at least 24 hours before putting furniture on it.
How to maintain your stained deck
After staining your deck, there one or two things to keep it looking great and excellent. You should wash down the surface of your deck often to keep dirt from damaging the surface.
Once you notice the deck stain starts to get grey or losing its color, you can easily use a bit of wood brightener with a light maintenance coat of paint. This will continually maintain your deck as you use it.
Materials and equipment needed
- Stain stripper
- Scrub brush
- Palm type sander
- Sodium percarbonate
- Pump garden sprayer
- Roller
- Paintbrush.
Pro Tips – Deck proper staining techniques
- Before deciding to stain your deck, always check the weather forecast to know if it’ll be favorable for drying.
- Clean your wood before staining.
- Use a palm sander for small spots of stain that won’t come off
- Use quality products to have the desired results.
- Before applying your deck stain, always read the manufacturer’s instructions to know the right application.
- Always use a paintbrush to work your paint on the wood.
- Allow drying entirely before use.
- While staining, be careful not to splash paints on the deck surface below, which means you have to cover the surface beneath to prevent giving it spots here and there.
Conclusion: How long should the deck stain dry before putting furniture on it?
So far, everything about deck stain has been discussed, ranging from how long it needs to dry before putting furniture on it to the factors that affect a stained deck drying time.
A stained deck needs to cure for at least 24 hours before you can start placing furniture on it. Also, we recommended high-quality water-based semi-transparent wood stains for use as it gives better results.
Likewise old decks should be cleaned and stripped of the older stains before application. These will help the paint to work effectively on the surface. You can leave your deck to dry for at least 24 hours before placing your furniture on it.
To stain your deck successfully, all you have to do is follow the steps and manufacturer’s instructions to get a desirable result.
Important Reads: