Top 5 Best Finish For Pine Dining Table 2022| Finishing a Pine Table
Have you ever seen a dining table and wondered if indeed there is something added to the wood to make it so clear brown and inviting? Well, I have even eaten at a family’s function all because of their alluring table. So do you think there is secret hiding between the grains of these woods? A lot of questions, but I tell you just an answer. The right finish!
You, too, can make such a beautiful attraction in your dining if you’d allow me to lead you through a list of the best Finish for Pine Dining Tables.
The value of a pine tree is in its timber. And the wood has made it one of the most commercially essential woods in the beautiful industry of woodworking and interiors. It is even one of the most long-lasting wood. The Pine is light in color. Usually, it comes with a creamy white look, but some varieties produce a white color, some even lean towards a yellow kind.
The light color is the strength of the pine. It makes it easy to stain with varieties of finishes and achieve any desired color. And if you don’t want it tinted, you can seal it with clear coats and let the natural color surface.
But how do you get the right finishes to give you your dream dining table because there are very many choices? No worries, my team and I have tested and tried many good finishes, and I’m ready to take you through five of the best Finish for Pine Dining tables.
All at a Glance
First, how do we finish a pine table?
I’ll tell you. You don’t need to be some Pable Picasso to be able to apply a finish. NO, you don’t need to be the apprentice of a great illusionist to perform the wonders of making an ordinary pine into a stunning good table.
All you need, I repeat, is the right finish with a lot of other suitable materials, and you’re not just painting your pine table, but your brush won’t stop on the mantlepiece until you’ve transferred this wonder to all your furniture.
The muse is sweeping you to paint the wooden doors of the kitchen cabinet. And every wooden article you may have gathered in the years.
How to Finish Pine Table

You want to finish your wood along the line. You might need to consider the following: What kind of coating you want. Is it going to be a transparent seal? That is, it would bring its natural color, no tint, just the pine’s yellow, cream, or white color. Or do you want it tinted?
What texture would you want on the wood? Would it be glossy, semi-gloss, or matte? It would help if you decided now, but you can skip that part. The first step is to prepare your environment.
Find an open space where you can apply your finish without intrusion. If you need to do it, this indoor, consider it a well-ventilated space. Some of these chemicals can release fumes that may be dangerous to your health, mostly oil-based finishes. So to apply them indoors, get two fans, one facing your workspace and another facing the window, blowing in through the window.
When this has been ensured, place a rag on the space you’d be applying your finish. Spread painting nylon on the space so you still have your floor protected when the chemicals spill. You don’t want to cure one and spoil the other.
Now prepare the wood.
Choose from our top 3 Picks


Last update on 2024-10-28 / Affiliate links / Images from Amazon Product Advertising API
Even if the wood has been formally sanded, you still need to file it one more time. Remember, sanding is the foundation of any finishing project. Sanding helps open up the pores in natural wood surfaces, which will allow the stain to set in better.
The best way to sand it is to use a variable speed Ransome orbital sander with a relatively compatible fine-grit sandpaper. Starting with 100 grit sandpaper and then progressing towards 180 grit by the end of the day. Remember, sand along the grain. Change paper often. Pine gums up ordinary sandpaper with pitch-laden dust that renders it dull.
The dull paper will mash the wood fibers instead of cutting them, which creates a cloudy appearance when you stain, which is not what we need. Set your sander at the lowest because too much force and speed can bear down the wood and damage the entire project.
Read Also: Best Finish For Restaurant Tables (Reviews & Buying Guide 2021)
The main lesson is anything that has an advantage has a disadvantage. Even though the pine is easy to sand, it is also easy to damage, so try and be careful enough. You, too, will know when you’re doing too much.
After you’ve sanded it with 180 grit paper, there surely would be a circular swirl on the surface of the wood. Now get a sand block and hand sand it till the surface is smooth, bearing in mind to sand along with the grain. Sanding across will make scratches on the wood’s surface, and it may be permanent on the surface even after finishing.
Be careful not to damage the wood, but in instances when you’ve mistakenly dent or scratch the wood, you can dampen and heat the area to raise the wood grain and make a repair.
When you want to apply a small quantity of water on the sent with a tiny brush, use a hot laundry iron covered with a soft cloth to heat the area. The area would rise. Then sand it to smoothness to go along with the others.
Because of their uneven dense grain pattern, the pine is hard to stain. Another thing is that the pine surface is always loaded with randomly occurring grain figures. With its hyper absorbent, soft texture, pine can be difficult to stain without prior knowledge.
It’s vital to seal pine before you apply your desired stain.
There would be visible blotches for tinted or colored finishes and uneven application as the wood might take in the colors differently based on Sealing also allows the stain to stand out boldly on top without simply absorbing too deep into the wood.
Sanding invariably leaves some fibers bent over and got them becomes compressed. A little bit of moisture causes the surface fibers to swell, returning them to their natural position. So grab a sponge or rag wet with water and run it over the wood. This will not only raise the grain but would also clean off the sawdust.
Run a conditioner over it.
To seal the pine table, rub a good amount of conditioner on the table in two coats. Two coats are what you’d need for a perfect seal or what the wood might blotch. The first coat will soak into the pine instantly. Following the second coat, you should notice the sealant just beginning to pool on the grain.
Should you sand again? Yes, you’d need to sand it, but you’d wait for about three hours for the conditioner to dry first. Once the sealant has set up inside the pores, you’ll be able to stain successfully without worrying about saturating the pine and creating a blotchy mess.
Now, to choose a finish. Like I said, would you be staining your wood for that kind of brown tinted wood, or do you like it amber yellow? If you like the natural color, you can get a clear coat and apply it straight on, but if you want it stained, you’d need the stain before using any finish. Let’s talk about staining a little.
The stain is the leading beauty of pine wood. The ability to select the best stain for pine furniture and even floors will determine the appearance and protection that your wood gets.
The brown woody look is not natural, and you don’t just go about looking for a block of natural brown wood. You’d have to make it that way, to your taste. To your specifications. More about that later on, though.
Gather supplies for your pine stain and mix it up. The products can differ, so it depends on your manufacturers’ specification. Follow the instructions to mix. And you can make your stain by getting a dark-colored dye, like an antique cherry brown, something close to chocolate.
If it’s a powdered dye, dissolve it in hot water, and if it’s liquid, follow the instruction on the label. No, apply it by soaking up a small stain with a scrap cloth or chisel-tipped brush and transferring it to the piece. Continue to brush the whole face of the table.
The sides, the block, every part of it for a uniform look. If it’s light in some areas or dark in some, do well to apply it to the lighter Ares as that means it is insufficient, na did a part us too dark. You can wipe off the color before it dries, or else you’ll be having a table of many colors.
After waiting for some minutes, probably two or three after dying, get a clean cloth and run it over the surface of the table to wipe off the excess dye. Let it dry for a little while, and then add another coat. You would need more than one coat to give it a well-uniformed look to Finishing The Wood.
You have a lot of choices to make when it comes to choosing a finish. There are lots of finishes that can do well on your pine table. You could decide to use lacquer, varnish, or any polyurethane for this. Though it is commonly said that the most applicable finish is the satin varnish, the polyurethane can not be unnoticed too.
Test the wood to be sure it’s dry. I bet you don’t want to apply a finish on a dry stain. It’s going to be whack! Rendering all your hard work useless. How do you check if it’s dry? Dab it with the side of your finger. The colors should not come off if it’s dry.
Once it’s dry, start to apply your desired finish. Brush one to two-layered clear coat on your wooden table. The good clear coat will be locked in the creamy finish. The finish would also safeguard the wood from moisture and general wear and tear. Like I said earlier, any lacquer, shellac, polyurethane, or even varnish can work well with pine. Though below, I’ll drop some reviews on what my team and I have tested and are proud to recommend to you.
Whatever finish you’re using, be sure to test between coats and ensure they’re dry before recoating. Now, allow your wood to dry thoroughly. Depending on your finish, some do dry within eight hours, while some finish dries later. But in any respect, wait for 24 hours for the table to solidify.
You should sit at the table away from touch. When it’s done and dotted, trust me, you’ll just not want to keep your gaze away from the beautiful and elegant creation of your hand.
Top 5 Best Finish For Pine Dining Table.
There are two kinds of stain. They are water-based and oil-based. Their names are dependent on the solvents used in producing them. Both depends on your specification. Though there are some considerations. There are certain features peculiar to each solvent.
Before you choose, you need to know the advantages of using a water-based stain:
- Water-based stains maintain the quality of color longer.
- Water-based stains are not nearly as flammable as oil-based stains due to the chemicals in oil-based products.
- Water-based stains dry relatively quickly and allow for a quick fix.
- Water-based stains can still adhere to your pine dining table even if it has been previously painted with an oil-based stain.
Below are the advantages of using an oil-based stain:
- Oil-based stains are not easily penetrated by the elements, unlike most water-based.
- Oil-based finishes dry more slowly than water-based stains giving way for a more even relaxed finish.
- Oil-based stains are far more durable than water-based paints and thus require far less maintenance.
- Oil-based stains are equipped with chemicals that can make them withstand the elements and be used for outdoor furniture and woods.
Some people would prefer the oil-based, while some would prefer the water-based. Still, I’d say, regardless of whatever stain you choose, whatever finish you choose, always aim for durable quality products. Just be sure to purchase a quality finish. That’s the deal! Therefore, to save you the stress, below is a list of products my team and I have tested and want to share our review with you.
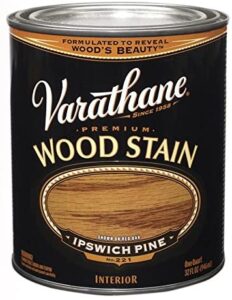
1. Varathane 211714H Premium Wood Stain, Quart, Ipswich Pine
First on my list is the Premium Wood Stain, Quart, Ipswich Pine0. If a stain would bring out the color ‘pine’ in a wood, this is it. That product provides richer, more natural color to your table and other interior wood furniture, cabinets, doors, trim, floors, and paneling.
Manufactured with superior soya oil-based formula, it offers deeper penetration and more real colors to reveal the natural wood grain’s beauty. Apply to wood for long-lasting, translucent stain. Uses exclusive soya-oil base and anti-settling formula for better grain enhancement with less stirring during application.
- Provides richer, more natural color to interior wood furniture, cabinets, doors, trim, floors and paneling
- Superior soya oil-based formula offers deeper penetration and truer colors
- Dries to the touch in 1-2 hours and covers up to 150 sq. ft.
- Wiping stain applies evenly without blotching or constant stirring, recoat after 2 hours
- Premium pigments enhance wood grain detail with a long lasting translucent stain
Last update on 2024-10-28 / Affiliate links / Images from Amazon Product Advertising API
Plus, it dries fast, dry to the touch in like 1-2 hours, and covers as wide as 150 feet square. All these drive it into the list of the best wood finish for the pine dining tables. It will give your done table a vibrant natural appearance.
Pros
- Fast drying time
- It covers a relatively large area.
- High penetrations for maximum protection.
Cons
- Sanding may not be easy.
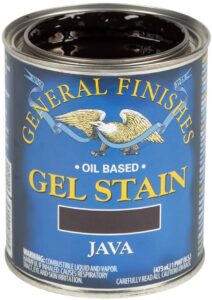
2. General Finishes Oil Based Gel Stain, 1 Pint, Java
If you are looking for the most finishing stain product, then this product is all you need. It’s an oil-based formula with that brown java color that gives your wood a little coffee look, making it the best stain for pine. It is a heavy-bodied stain offering your pine dining table adequate protection.
As I said, the General Finish Oil-based Gel Stain is Heavy-bodied and so does not penetrate as deeply into the wood as most liquid oil-base stains do. It sticks to the surface to give you a perfect coat. Because of this, the stain is often less affected by the condition of the wood and can help you get a more even appearance on difficult woods such as pine and aspen.
- This is the stain that has the most "finishing feel" of all General Finishes' products
- Woodworkers love the lustrous finish that shows up
- Heavy-bodied, and so does not penetrate as deeply into the wood as liquid oil-base stains do
- Can help you get a more even appearance on difficult woods such as aspen or pine
- Easy-to-use stains simply wipe on with a cloth or applied with a foam brush (no spills or splashes)
Last update on 2024-10-28 / Affiliate links / Images from Amazon Product Advertising API
It is effortless to use and can be applied using a rag. Though it is best applied with a foam brush, the absence doesn’t hinder the application.
Pros
- It gives you the most finishing feel ever.
- It cures into a lustrous finish that shows up.
- A heavy-bodied formula, it does not penetrate as deeply into the wood like a liquid oil-based stain.
- Works well with challenging to stain woods like pine or aspen.
- You can use it over painted wood.
- Easy-to-use stains to apply.
Cons
- It doesn’t have enough coverage compared to other strains in the market.
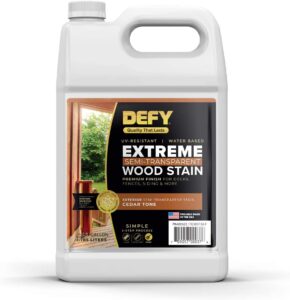
3. Defy Extreme Semi-Transparent Wood Stain
If you’re looking for the best water-based stain, I’d recommend the Defy Extreme. This Product is a ten out of ten in staining correctly. It is an environmentally friendly, water-based table stain that allows the wood grain to show through with a beautiful semi-transparent, natural matte finish.
It is excellent for staining dining tables, wood decks, fences, siding, playsets, outdoor patio furniture, and more. It’s like sunscreen for your wood. It has been fortified with Tiny zinc particles dispersed throughout the stain to reflect damaging UV rays, preventing premature graying and color loss.
- Deck Stain and Sealer with Superior UV Protection - Formulated with zinc nano-particle technology that acts as a sunscreen for your wood, protecting against harmful UV rays.
- Wood Sealer Outdoor Waterproof Stain - Creates a water repellent barrier that prevents water damage and extends the life of your wood surfaces. Enjoy lasting protection against the elements.
- Beautiful Outdoor Wood Stain Colors - Enhance the natural beauty of your deck, fence or siding with a stunning semi-transparent finish that highlights the grain and texture. Available in 6 colors.
- Easy to Use - Whether you're staining a deck, fence, siding, or any other exterior wood stain project, DEFY Extreme is easy to apply with a brush, pump-up sprayer, or airless sprayer.
- Soap and Water Cleanup - This water-based wood deck stain and sealer is 250 VOC compliant, making it better for you, your family, and the environment.
Last update on 2024-11-09 / Affiliate links / Images from Amazon Product Advertising API
The Defy Extreme will bring out the full beauty of your pinewood by highlighting its natural lines. As a water-based wood stain, it offers your wooden structures a long-lasting wood tone color without being bothered by the wood’s condition. And it doesn’t need sanding during coats.
Pros
- Heavily bodied formula.
- Fortified with Zinc Nanotechnology.
- Easy to clean, use and maintain
- It doesn’t fade, neither does it darken.
- Can be used with spray guns.
Cons
- Quick-drying time may make the finish not evenly distributed on its own, giving you much more job.
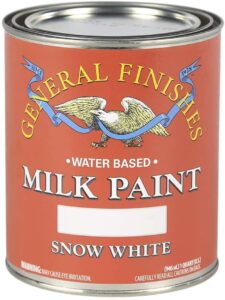
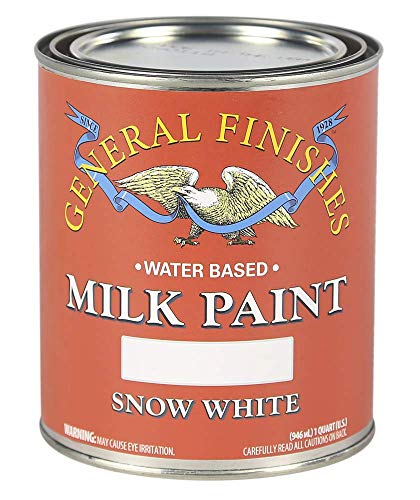
4. General Finishes Water Based Milk Paint
I’m recommending this particular product because when you focus more on one specific area, you function correctly. It’s right in this case. If you want that perfect gray color for your wooden table, your cabinet, or any other furniture, this is an excellent stain. It contains no percentage of the blue or green pigment, just plain gray.
We chose this as it works better to bring out that antiques look for your table. You would love the outcome when you use your dining table outdoors, maybe for a barbeque The General Finishes Milk Paint, like every other water-based interior/exterior acrylic paint, is formulated with zero VOC colorants.
This strain has very high adhesion that helps the stain stick to the surface rather than gets absorbed into the wood. The magic about his product is, it is self-sealing!
- This paint is self-sealing and does not require a topcoat
- Do not apply clear topcoats over bright white paint, as yellowing may occur due to a reaction to the substrate. Light color paints may also experience yellowing due to topcoat application, but it will less noticeable
- Extremely durable premium furniture paint with high adhesion rated for interior or exterior use.
- Apply over raw wood or prepped existing finishes. Perfect for upcycling and cabinet refinishing.
- Apply 2-3 coats by roller, brush or sprayer with an HVLP 2.0 tip. Water cleanup.
Last update on 2024-10-28 / Affiliate links / Images from Amazon Product Advertising API
It requires no topcoat at all. You apply the stain, and it’s good to go. It comes in 33 plain colors that would stun everyone when applied to your wood tabletop. You can choose between the myriad of colors, and hardly would someone believe it’s still pine.
You can apply the stain using a roller, a brush, or a spray gun.
Pros
- Durable stain.
- Self-sealing water-based.
- Requires no topcoat.
- It comes in multiple colors to suit your interest.
Cons
- Yellowing may occur due to a substrate’s reaction when you apply clear topcoats over bright white paint.
Since you’re not using a white-colored stain, you don’t need to worry about yellow staining. This stain would do your superb table right.
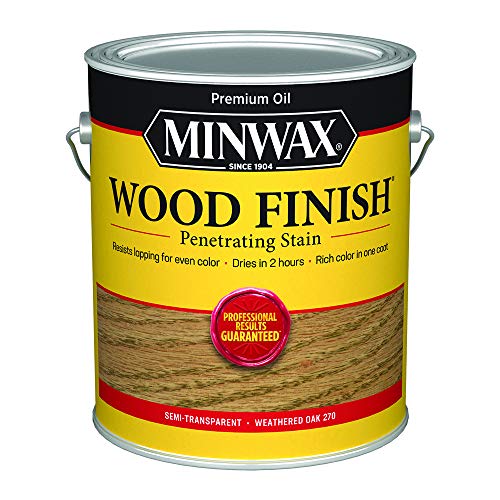
5. The Minwax 710470000
The list is never complete without the MinWax 710470000. It is perfect for staining unfinished wood furniture, cabinets, wood door, trim, molding, and hardwood floors.
I can tell you that you can never go wrong with any MinWax product. Minwax is America’s leading brand of wood finishing and wood care products, and their products render their function virtually. The Minwax 710470000 is available in 28 different beautiful colors that you can choose from to make your dining table more inviting.
- RICH EVEN COLOR – Minwax Wood Finish is a deep penetrating, oil-based wood stain that provides beautiful color and enhances the natural wood grain in one coat. It’s perfect for interior staining projects such as wood furniture, cabinets, doors and more.
- QUICK DRYING – Staining interior wood has never been quicker. The special formula allows it to deeply penetrate wood pores within 5 minutes of application, resists lapping, and dries in two hours, making all your wood projects quick, beautiful and easy.
- EASY TO APPLY – Use a clean cloth or wood stain brush to apply this wood stain in the direction of the grain. Wait 5-15 minutes and wipe away excess stain. The longer you wait, the darker/richer the color. Reapply coats for deeper color.
- WEATHERED OAK WOOD STAIN – This beautiful natural wood stain offers a light to medium oak color. The weathered oak finish has warm undertones and looks great on a variety of woods.
- A BRAND YOU CAN TRUST – Minwax is America’s leading brand of wood finishing and wood care projects. Since 1904, we have been inspiring consumers to Keep on Finishing. We offer consumers a complete line of products to meet every wood finishing need.
Last update on 2024-10-28 / Affiliate links / Images from Amazon Product Advertising API
The application of this product is also an easy one. It only takes wiping the stain on the wood using a cotton cloth or a foam brush. Then, allow it some time to dry. Drying time could be so fast, just 15 minutes. But you can wait longer. The longer you wait, the deeper and richer the wood gets. It is quick-drying. It gets absorbed well into the wood for better coverage.
Pros
- Fast-drying durable stain.
- It works well for pine and other surfaces challenging to finish.
- Long-lasting quality.
- It comes with easy application with just a rag, a foam, or a brush.
- Total coverage is high, about 150 sq feet per quartz.
Cons
- The drying time means you’d need to be on the look out or else you’d have to sand to apply a recoating.
My team has reviewed all the products here. And we assure you, they are as accurate as I’ve said here. They have passed the criteria that a lot of pine users expect. And I’ll be talking about that later. But right through here now, try, and you’ll see that they’re worth the troubles we’ve gone through to write out their strengths and weaknesses.
Considerations for picking the best finish for pine tables
Now that you’re ready to choose your stain, What are the things to watch out for when you decide to choose for yourself a perfect wood stain? You should know that there are several stains, and they don’t perform similar functions.
So you should always bear in mind that your specifications can determine the kind of stain you’d use. Since you’re finishing a pine dining table, I’ve written down a list of all the criteria and the things we looked out for before choosing these products as the best.
Quality And Durability.
The first thing to look out for is the quality of the product. How long will it last? Pine lasts a long time and deserves a finish that would not wear out as it ages. In fact, in Ontario, it is boasted that there are lots of 200-year-old pine furniture looking almost as good as new. What’s the secret? The finish.
The stain is part of what would help preserve the wood’s life, so it deserves scrutiny on its territory. You wouldn’t want to get a product you’d reapply in the next few months or every few months.
Application
There are specific ways a finish can be applied. You need to know if your finish would be usable with spray guns. Some products can’t. Simultaneously, you can apply some as quickly as using just a rag or a simple foam brush. You can spray most of the products on the list for faster application.
Coverage
The average coverage of a finish is 150 square feet or more for me. If a product is lesser than this, I wouldn’t say it’s not enough but calculate whether it would be sufficient for you. To do this, measure the width of your table in inches and then multiply times the height. Multiply the width and height of all sides to be coated (including the top).
Add all of these totals together. Divide the sums by 144 to determine the total square feet you will need to cover. If this calculation can still fall under what your stain can afford, then it’s not too small.
You can choose it. But know you’d be multiplying times the number of coats, plus the number of tables you’d be finishing. That’s the coverage calculation. You can do this before you buy any stain or any finish product to ensure its coverage.
Conclusion – Best Finish For Pine Dining Table
A lot has been said today about pine and its finishing. Finishing Pine with the right product is the secret of long-living beautiful wooden furniture. If you care about your dining table, you will get quality products to save its natural beauty. If you look well, you’d see that for every stain. We’d made provisions for the advantages and the disadvantages.
This is in a bid to let you understand more about how the products work and if its disadvantage wouldn’t mean much to you. For myself, I’d prefer a product with much coverage, while someone with kids might want to get a quick-drying product. And some might need the two.
That’s why we have products like the Varathane 211714 that combines good coverage, quick-drying, and resistance to elements. Gets such a product doesn’t come without its disadvantage. Because of its quick-drying formula and its chemical combination, you will need to sand in between overcoats. And sanding can be stressful with its gummy substance.
The Minwax 710470000 doesn’t need sanding in between coats but does that mean it’s no flaws? No, they have downsides, even some out there have worse, but we’ve chosen the ones with mild downsides that will not affect your application in the long run.
Before you start finishing, keep your surrounding in mind, spread rag to collect stain spills. Also, if you have children that might intrude during your application, use them outdoors, don’t make them inhale fumes that might be dangerous to their health. And you, too, might need to use protectives like a mask to prevent inhaling the fumes that some oil-based finish produce.
Important Reads:


