How to Repair Rotted Wood Beams
How to repair rotted wood beams? Once you have wooden furniture and home ranging from cabinets, decks to beam, it’s inevitable to have as much as a bit of source of moisture getting into the wood, coupled with a favorable temperature, that’s all fungi need to start breeding, multiplying and dividing infesting in the wood which eventually leads to wood rot.
Perhaps you’re wondering how to repair your rotted wood beams; this is just the right article for you!.
Although you might have your wood beams rotting, technically, they might be in different stages. You might have your beam just rotting at the surface, and that can be easily treated using boric acid.
The rays might rot at the junction points, and this needs to be carefully taken care of. We outlined the different methods you can use to repair rotted wood beams regarding their level of decay.
It is also essential for you to know the causes of rot in wooden beams and how to prevent them, all of which are well explanatory in this article.
All at a Glance
What causes rot in wood beams?
To start with, before you embark on any reconstructive measures to repair the rotted wood beam, it is important that you fully understand what brought about the rot in the first place. Topping the list of causes is remnants of moisture in the wood.
This is an awful wood rot because it creates the perfect environment conducive enough to enhance fungal growth. This, in turn, causes the fibres in the wood to reduce in value and strength as these fungi feast on the part of the wood that supplies these qualities.
Not only fungi can destroy wood beams. Termites are also a significant wood rot perpetrator. They also have a high liking for moisture in the wood, making them spoil the wood beams as soon as they attack the wood and tear down the wood’s strength.
Getting to understand wood rot and the type of rot makes it easier to treat the wood more effectively. Wood decay often occurs when excess moisture gets its way into the wood.
The water gives room for moisture and high-level humidity, which is the environment that encourages bacteria and fungi that feed and infest on the wood.
As the fungus feed on the wood, the fungus spores germinate and colonize, thereby spreading to the other parts of the wood, which results in the successive decay of the wood.
Dry rot, which is one of the types of wood rots, is the most destructive. It ravages wood with a moisture content of at least 20%, while wet rot requires at least 50% moisture content before the wood starts decaying.
Still, it’s evident that moisture causes a lot of harm to wood, and it’s always advisable to treat your wood as soon as you notice any trace of decay.
Types of wood rot
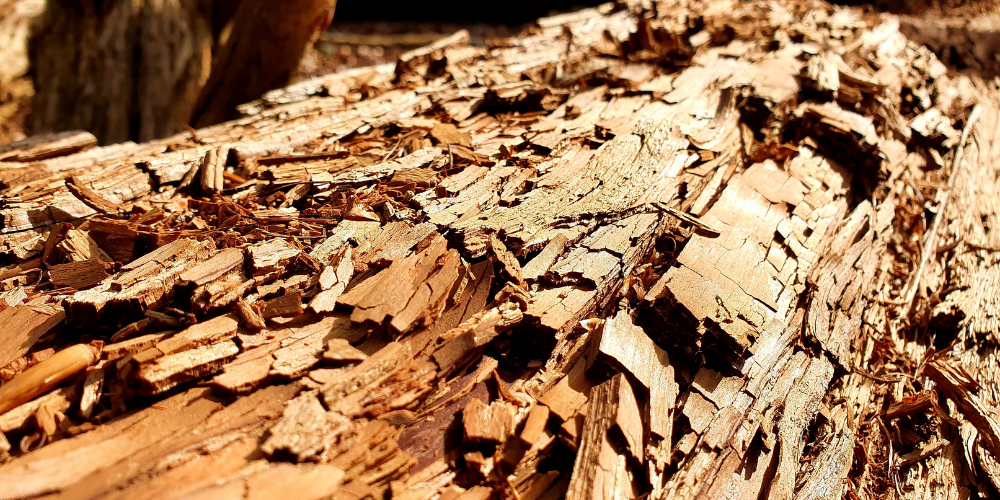
Before you treat your wood rot, you need to know the type of wood rot you’re dealing with first. This will help you to understand how to treat your wood most suitably. There are different types of wood rot and numerous types of fungi that can trigger rotted wooden beams. They are classified by the effects they have on wood. There are four types of rot which are the white, dry, brown and soft rot.
White rot
White rot is easily detected with its color, although it doesn’t have the exact white color until it gets to a particular stage in the rotting process. White rot makes the wood soft, making it look spongelike.
With this type of rotted wood beams, the wood would have a light yellow or whitish shade. It would also feel spongy. The white-rot fungi will break down the lignin of the wood, which is an element of the wood structure. It will leave behind light-colored cellulose.
Brown rot
Brown rot is not so-called because of the color the rot possess. The characteristic feature of brown rot is that the wood with the rot shatters apart so much that it crumbles, and as the decay process elongates, the wood gradually rot till it turns into powder.
This is often referred to as “dry rot”. The fungi target the cellulose in the structure of the wood. When this is destroyed, the wood beams will shrink and turn a deep brown.
It will also break down into small cube-shaped bits. This process is called a cubical fracture. Once it starts to grow, it rapidly spreads.
Dry rot
This is a type of wood that is completely rotted with the decay processing completed. White and brown rot eventually graduate into dry rot. Dry rot is done with the rotting process and won’t rot any longer.
Soft rot
This type will decompose wood slower than the other two types of fungi. It will also thrive in temperatures that are too cold or too hot for the other fungi, between 0-110 degrees Fahrenheit. It will break down cellulose.
When it does, the wood will have a honey-comb-like appearance. Although it is most commonly found on fallen trees and logs, it can cause rotted wooden beams if the conditions are right in the home.
Is it necessary to repair your rotted wood beams?
A very big YES to that question. Failure to repair rotting wood beams or any wood whatsoever in the process of rotting will lead to the rot spreading to other wood in your home. The decay gets worse with time, and no wood around the rotting ones is safe.
If it comes to your notice that wood is rotting away and you decide to do nothing about it, what you turned a blind eye to that would have required a simple repair procedure would become a huge issue.
Hence, fix the wood rot as soon as you notice it to prevent future expensive repairs that may need a wood professional’s services to correct the problem.
How to detect rotted wood beams
You’ll be needing your screwdriver when it comes to detecting your rotted beams. First off, you’ll have to poke the wood to see if it is crumbling because that will help you note the level of decay and disintegration.
Also, you need to take note of wood that has any form of discolouration. Once you detect that, it implies the presence of rot and fungi.
Also, if you notice any form of peeling paint, don’t assume. First, feel the area, and once you see the site is moist, you need to check for sources of moisture that might lead the wood to rot.
Steps on how to repair rotted wood beams
The moment you detect rotted wood beams, you can’t just leave them to continue rotting away. It would help if you took the necessary actions. We’ll be looking at steps on repairing the surface damage on beams, beams and joist rot, junction point on beams and the inside of the beam.
How to repair rotted wood beams surface damage
Take note of the surface damage. First off, the wood’s surface has to be dry, then use a spackling paste, then sand, prime and then repaint. This is only applicable if the beam is only affected on the surface.
You can also apply an epoxy filler or wood preservative that has borate or copper in its component. To use the boric acid, all you have to do is either sprinkle or spray it on the wood’s surface, especially the affected area and allow it to dry for a few days.
Steps on how to repair rotted beam and joist
Step one: Get rid of the loose wood
The most important thing is to remove all lax woods at every angle of the beam and give it ample time to dry.
Step two: seal the beam ends
get a clear penetrating epoxy sealer and apply it along the beam ends. Ensure that the end grain takes in the CPES effectively. This will solidify any remaining ant wood that is still soft, which will, in turn, reduce the rate of infestation by fungi.
Step three: leave to dry for a few days.
Step four: Fill up the vacant spaces
You’ll have to make use of an epoxy filler as it’ll quickly bond with the CPES already treated surface. After applying, please leave it to dry before you decide to repaint it.
Just in case you desire a toned finish for your beam, you can color the epoxy filler to your desired shade of brown using an epoxy coloring agent and allow drying.
Steps on how to repair rotted junction points on beams.
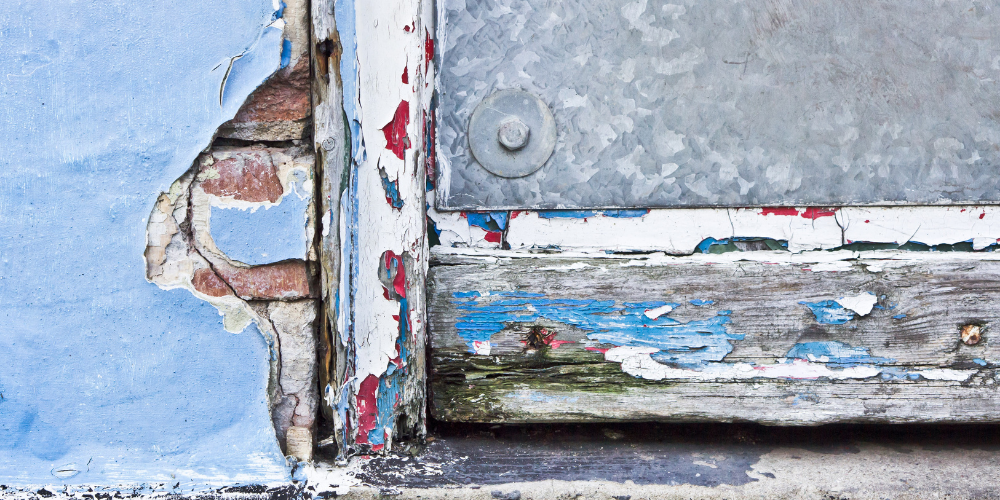
Junction points on beams are one of the most important locations for the growth of rot. I’m sure you’re wondering why that is. It’s simply because moisture easily gets trapped in the space. That’s why we’ll discuss the steps on how to repair wood rot in this particular area in beams.
Step one: Know the extent of the damage.
You need to know how much damage you’re handling, and knowing that, first off, you need to drill small holes inside the beam or poke with a piece of stiff wire to see the extent of the rot.
Step two: Get rid of the loose wood.
It is also important to remove all lax woods at every angle of the beam and give it ample time to dry.
Step three: Apply CPES
You can either brush in or spray on the CPES on the affected area depending on your application method and while applying, make sure it is evenly distributed.
Step four: allow drying for five days.
Step five: Fill up extra spaces
making use of an epoxy filler, stuff every space, and perhaps you realize the earlier removed open woods were much you can actually make use of treated wood and then make sure the epoxy filler bonds well with it and allow to dry for a few days.
Steps on how to repair rot on the inside of the beam
Step one: Remove all loose woods
Step two: Drill in holes
You’ll have to drill in holes and do that. You’ll be making use of a quarter-inch drill bit to drill downward sloping holes into the inner part of the highly affected areas.
While drilling, ensure you drill the holes closer to the top as much as possible so that it’ll be easy for the sealers to move down and deeper into the wood.
Step three: Pump in the CPES into the holes
Spurt the CPES into each hole carefully, although some liquid might streak out of the holes by the sides of the beam. No worries, you can brush coat any affected exterior part of the wood.
This will enable the wood to take in as many CPES as possible. The CPES is essential in this step because it performs three primary functions, it renders the rot causing agent, which is the fungi, inert, hardens the soft portion of the wood, and creates an epoxy primer base.
The solution gas amber color, and in case there is another surface you don’t want tampering with, you can cover it using a poly tarp. Then leave to dry for a week.
Step four: Apply your resin.
Pump in your resin using reusable caulking tubes of around 10 oz in size. Make sure a generous amount of resin is applied into the holes, and for leaking holes, you can use cardboard covered with plastic kitchen wrap and then allow it to dry.
Step five: Reapply the resin.
For this step, you’ll repeat the process in step four, but the only difference is that the resin will be mixed with either sawdust or wood flour and then pump into the holes and leave to dry. Allow drying for a day. We’ll recommend you use Layup and laminating resin.
Step six: Apply an epoxy filler.
To finish the repair process, apply epoxy filler to all the vacant areas on the wood’s exterior parts, leave them to dry and sand.
Materials and equipment required
- A quarter-inch drill bit
- Cardboard
- Plastic kitchen wrap
- Waxed paper
- Sawdust/ wood flour
- Brush
- Stiff wire
- Spackling paste
- Screwdriver
- Epoxy filler
- Caulking tubes
- Resin
- Packing tapes
- Paint
- Boric acid.
Conclusion – How to repair rotted wood beams
So far, we’ve discussed everything regarding rotted wood beams, right from what causes wood rot to the different types of wood rot, how to detect decay in wooden beams and how to treat it.
It is essential to get rid of every moisture source from your wood as this will prevent your wooden beams from decay-causing agents such as fungi. For you to get good results, you must make use of high-quality products. This will give the wood enough strength and resistance to fight off any form of rot.
Important Reads:


