How to Prevent Bubble Formation During Polyurethane Application
Seeing bubbles when applying polyurethane isn’t a new problem. In fact, most painters, at one point, have experienced bubble problems when using polyurethane on wood and other floors.
While some painters have found a solution to it, others are still experiencing bubbles when applying polyurethane.
The fact is applying polyurethane to a surface is more than just dampening a brush in a finish and applying it on a surface. Applying polyurethane involves techniques, which, if used correctly, will leave you with an excellent finish.
Here in this article, we will discuss what causes bubbles when applying polyurethane over surfaces and how to apply polyurethane without bubbles.
All at a Glance
Causes of Bubbles When Applying Polyurethane

So what are the causes of bubbles in polyurethane?
Using the Wrong Brush
There are different types of brushes used for applying polyurethane. For an impeccable finish, you need to ensure that you’re using the ideal kind of brush depending on the type of polyurethane.
If you intend to use oil-based polyurethane, it’s best to use brushes with natural bristles. Natural bristle brushes are brushes made from animal hair, especially Ox.
However, you should note that not all Oxens have the same hair texture, just like humans. Most people consider the European Ox hair as the standard for natural bristle brushes.
For water-based polyurethane, you should use synthetic/ nylon bristle brushes. If you apply water-based polyurethane with natural bristle brushes, the brush will clump and leave brush marks on your application instead of beautiful and clean painting strokes.
In other words, the bristles will absorb the polyurethane instead of transferring it to the surface.
Lack of Proper Brush Preparation
Improper brush preparation is another major cause of bubbles forming on your surface. Before you apply polyurethane onto a surface, moisten the brush to remove the air bubbles stuck in between the bristles. This also softens the bristle before the next application and makes it even better.
For water-based polyurethane, dampen it in water, and for oil-based polyurethane, soak it in mineral oils. Soak the brush until air bubbles stop rising from the ferrule.
You can dry the brush by dragging it across an old newspaper.
Shaking the Polyurethane Can Before Application
Read Also: How Long Does It Take For Water Based Polyurethane To Dry On Hardwood Floors?
How to Apply Polyurethane to Wood Floors Without Bubbles

- Sandpaper (80-grit, 120-grit, 180-grit or 220-grit sandpapers)
- Applicators (foam brushes, finish brushes, sponges, rags)
- Tack or dry cloth
- Polyurethane
- Thinning agent (mineral spirits for oil-based and water for water-based polyurethane)
- A mixing container
- A bowl for cleaning your brush
Step 1: Get Rid of Dust & Prepare the Surface
Before applying the first layer of polyurethane, either water-based or oil-based, ensure you prepare the surface. This includes sanding the area properly and getting rid of the dust.
Sandpaper differ in grits, with the lowest number the most coarse. In this step, use 80-grit sandpaper. The purpose of sanding with this coarse paper is to create scratches in the wood’s surface so that the polyurethane can adhere better.
For subsequent sanding, use 120-grit, 180-grit, and 220-grit sandpapers in that order.
After sanding the area, vacuum the area to get rid of the specks of dust. Dust can hamper the finishing, so ensure that the surface is dust-free. The environment should be free, and the tools should also be dust-free.
Alternatively, you can damp cloth in mineral oil or alcohol to wipe the surface clean.
Step 2: Don’t Shake the Can
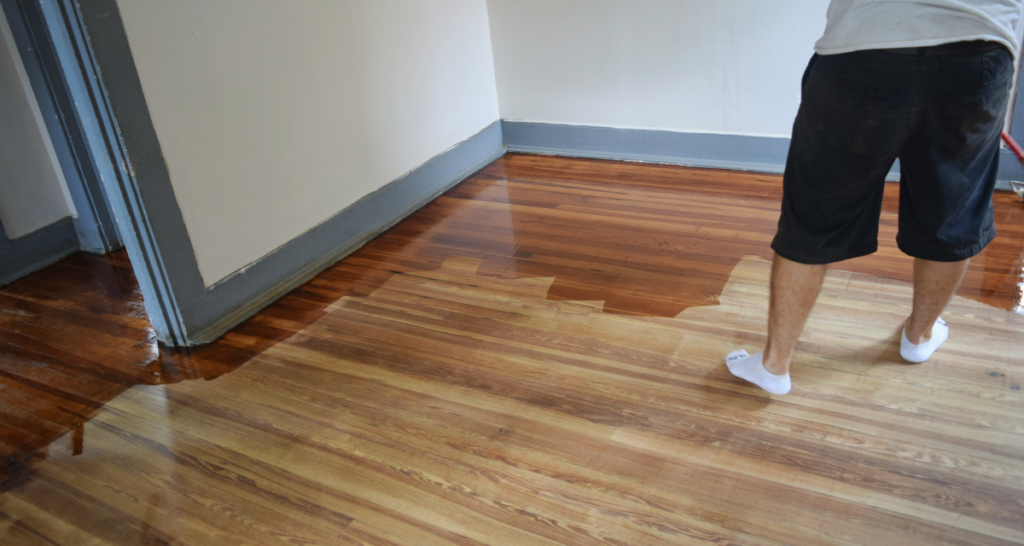
Polyurethane is very thick in the can and challenging to apply without bubbles. Like I earlier explained, don’t shake the polyurethane, as it will form bubbles inside and be transferred to the work surface.
To reduce the polyurethane thickness and curb bubbles, you need to mix it with a solvent with the right ratio. I recommend mixing three parts of polyurethane with one part of the solvent.
Carefully stir the polyurethane in the can to get rid of the air bubbles. Carefully pour three parts of poly into a separate container. Then pour one part of solvent into the same container and mix.
Use mineral spirits as the solvent for oil-based poly. You should use water solvent for water-based poly.
Step 3: Apply Thin Coats
Polyurethane finish is better when you first apply thin coats. Applying thick coats will attract dust and make the surface uneven. Not to talk of thick coats take longer time to dry and tends to create bubbles.
Thick coats are the best and offer the best protection, but it’s better that you apply multiple thin coats to achieve the required thickness rather than apply a thick coat at once.
You can apply a thin coat of polyurethane with foam brushes, sponges, or finish brushes. Remember to use a natural bristle brush for oil-based polyurethane and synthetic/nylon for water-based polyurethane.
Dip the brush into the poly container and hold it over the container to allow the surplus paint to drip off. Set your brush down in the middle and drag it gently to the right side. Repeat the process when applying to the left side until you are done applying.
After you have applied the first coat, allow the finish to dry. At this point, take your time to check if there any bubbles. If you notice any bubbles forming, dab them with the tip of the brush, mostly if the finish hasn’t completely dried up. You can run the brush lightly along the surface to flatten the bubbles.
If the finish is already dried up by the time you noticed the bubbles, don’t worry. You will get another chance to get rid of the bubbles when sanding the surface.
Step 4: Sand the Surface Between Coats
After applying the first coat and the coat must have been dry, sand the surface to smoothen it and get rid of dust and any other thing that may get stuck during the drying process. Avoid sanding the surface too much by using 120-grit paper to sand the area.
At this point, you should observe if there’re any bubbles on the surface. If there are, use a fine grit or 180-grit sandpaper to remove the bubbles. Sand lightly to avoid sanding off the entire finish.
Use a damp or tack cloth to wipe off any dust, and then apply a fresh coat of polyurethane.
How to Apply Water-Based Polyurethane Without Bubbles
You may ask, “how do I apply water-based polyurethane without bubbles?” I’ll answer that question in this subsection. Here, the surface I’ll be talking about applying water-based poly is hardwood floors.
Things That You Need
You will need the following tools to carry out this project successfully;
- Applicators (synthetic brush)
- Water-based polyurethane
- Damp cloth
- Sandpaper (80-grit and 120-grit)
- Vacuum machine
- Mixing stick/ stirrer
- Container/ mixing bowl
Step 1: Sand the Surface and Vacuum the Floor
Sanding and getting rid of dust and foreign materials on the wood floor is the first thing to do before applying water-based polyurethane. This process is vital as it makes your wood floor ready for coating.
Sanding makes the floor adhere to coating smoothly. However, it would be best if you determined the condition of the floor before sanding.
If you want to change the wood floor color completely, I suggest you sand down the surface to the bare wood. But if not, only sand the surface. Use 80-grit sandpaper or a sander machine if you want to be quicker.
Vacuum the floor thoroughly to clean all the speck of dust and unwanted particles like hair, cotton, etc. You can use a damp cloth dipped in white vinegar to give the floor a wipe-down. Allow the floor to dry afterward.
Step 2: Pour the Polyurethane Into a Container
Unlike oil-based polyurethane, water-based polyurethane isn’t so thick. So I advise that you don’t mix it up with any liquid except for distilled water to reduce the thickness into thin coats.
Pour three parts of the poly into a container. Please don’t shake it before pouring to avoid creating bubbles. Pour one part of water into the same container and stir properly to remove any bubble. You must have the right quantity that will be sufficient for the area you intend to coat.
Step 3: Apply the First Coat
With water-based polyurethane, you need to apply the coat three times. Apply the first coat with a synthetic brush around the corners. Then move to the other parts until the whole room is covered. Don’t apply so much pressure while applying the first coat.
Step 4: Allow It to Dry
Because water-based poly is not so thick, it dries pretty quickly. The drying time usually takes between 2-4 hours between coats.
Step 5: Apply the Second Coat
When the first coat is fully dry, gently sand the floor with 120-grit or 180-grit sandpaper to smoothen the surface. Use a damp cloth to wipe down the dust or use a vacuum cleaner, and then apply the second coat. Allow it to dry for another 2-4 hours.
After it’s dry, sand the floor again gently, but this time, with 220-grit sandpaper. Then apply the third and final coat. Remember to stir the paint every time before applying the next coat.
How to Apply Oil-Based Polyurethane Without Bubbles
What You Need
- Protective pieces of equipment (mask, gloves)
- Applicators (natural bristle brush)
- Oil-based polyurethane
- Mineral spirit
- Damp cloth
- Sandpaper (80-grit and 120-grit)
- Vacuum machine
- Mixing stick/ stirrer
- Container/ mixing bowl
Step 1: Prepare the Floor
Start by sanding the floor with 80-grit sandpaper. If you want to strip the wood of its colors, I suggest using 36-grit to 60-grit and sand the floor, including the corners for at least three times.
Step 2: Clean the Floor
Now that you’ve sanded the floor, the next thing to do is clean the floor of sawdust, dust, and debris. Vacuum the floor at least twice to ensure that the area is completely dust-free.
Step 3: Dilute the Polyurethane
Oil-based polyurethane is known for its thickness. Since it’s not a good idea to start by applying the thick coat, you’ll need to dilute the poly. This means mixing it with a solvent.
Pour three parts of the poly into an empty container. Please don’t shake it before pouring to avoid creating bubbles. Pour one part of the mineral spirit into the same container and stir properly to remove any bubble.
Step 4: Apply a Thin Coat
The general thumb rule is to apply oil-based poly twice since it’s relatively thicker than water-based formula. However, you can apply up to three, depending on how thick you want the surface.
Apply the first coat with a natural bristle brush starting from the corners. Then move to the other parts until the whole room is covered. Don’t apply so much pressure while applying the first coat.
Step 5: Allow it to Dry
The oil-based finish takes longer to dry than the water-based finish, so you should allow for up to five to six hours for the first coat to dry. After that, you can go ahead and apply the second.
Step 6: Apply the Second Coat
When the first coat is fully dry, gently sand the floor with 120-grit or 180-grit sandpaper to smoothen the surface. Use a damp cloth dipped in mineral oil to wipe down the dust or vacuum the surface. After that, apply the second coat. Allow it to dry for another five to six hours.
Conclusion
Polyurethane finish is one of the most used finish for coating wood and other floor surfaces. Coating with polyurethane enhances your floor’s durability and improves its aesthetics, further making your home look beautiful.
However, not everyone understands how to apply it without creating bubbles. Thankfully, this article has explained how to apply polyurethane without bubbles. I’m pretty confident that your finish will appear smoother and bubble-free with all the steps mentioned here.