How to Paint Letters on Wood with Stencils (DIY Guide)
Wood can be a tedious piece to work with. Either you’re painting a mere wooden sign or beautifying furniture. It might be tiring getting straight, perfect lettering on a wooden surface. This task requires a lot of preparation, patience, and proper painting materials.
Stenciling is a form of art that creates a feeling of creativity as a handmade work of art. The fantastic feeling it leaves us whenever we peel off the stencil to see those great works of imagination is indescribable. Learning how to paint letters on wood with stencils is a fantastic way of bringing out the inner creativity.
All at a Glance
How to paint letters on wood – How to Stencil on wood with Acrylic Paint

Painting on wood with stencils is a task that requires a whole deal of concentration, preparation, patients with suitable painting materials and tools to make the entire work easier. However, it’s necessary to know the basic steps to follow to make this great work of art without stress.
Step 1: Preparing your wood
The first thing to do when preparing your wood is to cover the surface you’re working on. No matter how meticulous you might be, it’s always safer to cover any surface you don’t want to get paint on. You can use an old towel, an old newspaper on the surface you’re working on. The next thing to do is clean the wood. Even though it looks neat, you still need to give the surface a clean wipe.
You can dampen a towel with warm water and sweep it all over the surface. In case you’re working on a piece of furniture that has a bit of hardware on it, remove it before you get started at all. If you want to clean your wood surface, you can create a simple cleaning solution that contains a cup of water and a cup of vinegar. Then perhaps if you feel you want to clean deep, you can dip your small towel in a solution containing 1cup of water,1/2 cup of vinegar, and 2tsp of borax.
After cleaning, use wood filler on the surface if it has holes and indentations where you want to apply the paint. The next thing to do is to sand the wood. This is very important, in case you’re working with a piece of furniture that has lacquer or gloss on it, the sandpaper will remove it, making your paint adhere to the surface, and in case you’re using bare wood, it will help to create a smooth canvas for the painting instead of being bumpy and uneven.
Take note while sanding to exert light pressure going with the grain of the wood. Use 100-grit sandpaper to remove any finish on the wood. Once done, you can use higher grit sandpaper to soften the wood. After sanding, dust on the surface will be dust, no matter how small or oblivious it might be. You still have to dust it off anyway. To dust, you can use a clean paintbrush to clear the dust, or you can use a spare towel instead. It’s important to dust the surface thoroughly to make the paint adhering to the surface way easier.
After dusting, apply a primer to the wood. Before you decide to use your colors, it’s necessary to use a primer. Using a paint primer creates the perfect base for paint by sealing the wood’s pores and giving the surface something to stick to securely. It’ll help to prevent your paint from fading and chipping off.
Step 2: Using Stencils
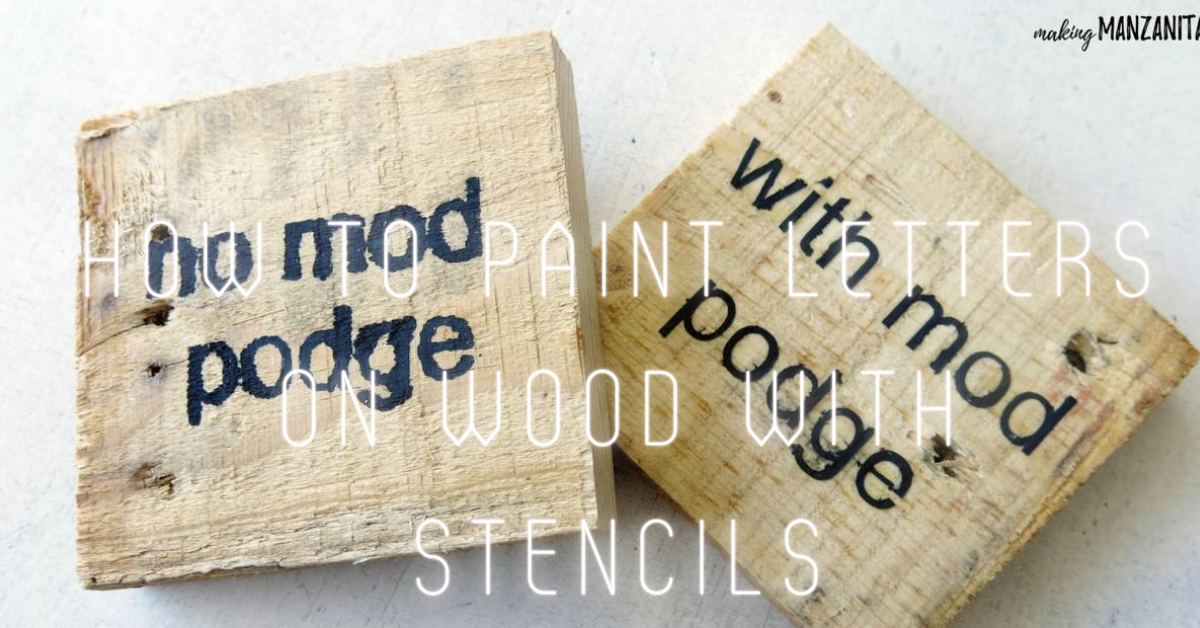
The first thing to do is to design your lettering. If you’re a pro in freehand ability, you can skip this step, but if you’re a beginner, or you’re not good with freehand. You want to get perfect letters, you can easily design them on the computer using Microsoft Word, typing your desired letters and print it out.
The next thing to do is to trace your letters onto the wood. There are various methods of outlining. One approach is to cut out your notes from the paper and Trace around them, but this will only work if your letters are significant, even, and easy to cut out. Then flip your printed page over to have you working on the blank side.
Then use a pencil to color everywhere so that pencil lead will be on the back of all your printed letters, then turn the page over and put it on your piece of wood in such a way that the printed letters will be facing up. After that, use your pencil to trace over every line of the letter once again, then remove the paper. The lead on the backside of the paper would have transferred onto the wood with the pressure of your tracing, giving you space to fill with paint, then it’s a go-to creating perfect lettering!
You can get a precut stencil that is perfect for painting letters on wood at a craft store. To get a better result, you’ll need a stencil paintbrush as well as a spray adhesive. At this point, total concentration and patience are required. Take your time to line up the stencil onto the wood in the exact way you want your lettering to appear. You can use a pencil to mark up the stencil to show where it should lay on the wood.
Shake your can of spray adhesive and spray lightly on the stencil to make it stick on the wood to prevent it from shifting during painting. Once your stencil is stuck on the wood, use a stencil brush to lightly dab acrylic paint onto the wood through the stencil. Allow your paint to dry for a few minutes before removing the stencil from the wood.
Step 3: painting letters
When it comes to freehand painting, it’s good to have various brush sizes and textures to choose from. Brushes with square bristles are the best for creating the thick and straight outlines of letters, while small brushes are great for details. To ensure your letters are straight, you can use a ruler.
To have even letters across the wood surface, it’s advisable to use a straight-edge with a pencil and then outline a soft line to follow. Dab a bit of paint onto a paper plate before painting. Be careful to follow any lines you’ve put in the wood, and in case of mistakes, use a clean, damp towel to wipe it away gently.
Step 4: Finishing
Acrylic paint dries pretty fast, but I recommend you give it few hours to ensure it’s scorched, and if you feel you need to apply a second coat to any of your letters, you can do that after the first coat is dry. Then use a clear acrylic polyurethane topcoat that will seal your painted letters on the wood. Then ensure your sealed work sits for at least 24hours to make sure it’s completely dry and your excellent piece of art is ready.
How To Paint Letters On Wood With Stencils – Letter Stencils For Wood
Letter stencils for wood are a useful and fun way to personalize your woodworking project. Letter stencils have been around for decades, but they have recently become popular again in the US and UK due to their availability as an inexpensive yet creative means of decorating and personalizing walls, furniture and other items.
When considering how to make letters on wood, you can use letter stencils on virtually any type of wood, such as dark or light timber, plywood, particle board and MDF (Medium-Density Fibreboard) or any other material that will accept paint or stain.
With letter stencils for wood, you won’t have to create designs with masking tape or anything else. This saves time and makes sure that your work is neat and stylish.

Advantages Of Letter Stencils For Wood
The pros of letter stencils for painting on wood include:
The complete set of Alphabet
The spray paint letter stencils usually consist of 42 templates, including a total of 132 designs, varying in more than 2 fonts, including 52 uppercase and 52 lowercase letters in 2 fonts, 10 numbers and 18 most common signs. They are designed to serve as reusable stencil templates, which can meet your desired needs and show personalized and unique creativity at all times; you can use them on walls and wood.
Easy To Use And Maintain
The stencil letters for wood will save you time when creating crafts, allowing you to customize words and numbers to start any project you want. Apply them to a flat object, paint or spray with a spray gun, and you’re done! They’re reusable and easy to clean with soap and water.
Premium Quality
All spray paint letter stencils templates are made of premium quality mylar material, washable and reusable, tear-resistant and not easy to damage. They are easy to clean with soap and water. Laser-cut, no sharp edges; safe for children; although made of durable material, they are very thin to ensure they fit the wood or walls better when you use them, making your artistic creation more standard and natural.
Wide Range Of Application
The stencils for painting on wood set is made of durable and flexible PET material, and it has smooth surface allowing you to apply them on a flat surface: wood, paper, fabric, canvas, burlap, glass, metal and more. Complete a set of letter stencils to meet your artistic creativity at any time. Great for wood signs, posters, invitations and t-shirts advertising; packaging; home decorations; party decorations and more.
Disadvantages of letter stencils for wood
The disadvantages of wooden letters paint stripes are discussed below.
Paints inhibit moisture
Paint traps moisture in the wood, causing it to expand and contract, which can cause paint failure. This is especially true for decks painted directly over wood underneath them; moisture can soak into the wood from beneath.
Paints on wooden letters tend to be permanent
Paint tends to be permanent on a wooden surface once applied. Painting with a darker colour can also result in the colour fading faster, which means you will need to recoat the surface more often.
Recurring potential problems
If you have previously painted wood around your home and it has had problems, such as extreme peeling or bubbling, painting that same area again will often result in further problems arising in the future
How To Paint Letters Freehand
If you want to paint letters freehand, it can be tricky. I’ve been painting in the kitchen and on my porch with chalk in large letters, which looks funny. But I didn’t want to use an ink pen and risk messing up my walls. So, I’m going to show you how to paint letters freehand.
6 Steps Involved In Free Hand Painting
Print out the words on a piece of paper
The first thing to do is print out a piece of paper to see if you got in focus the word that you want to write on the sign and then transfer it to the sign with some transfer paper.

Transfer it to the sign with some transfer paper
The next step is to transfer it to the sign with some transfer paper. There’s grey, dark, black, and white transfer paper else in a bit and get that transferred and then come back to your painting.
After transferring the letter with a pen, ensure you don’t darken it, which you will notice on the skinnier part.

Start your painting
Also, you’ve got to get your brush and stuff ready; you are going to start with a script liner to do the skinnier parts, and right here, it turns skinny from the wide part, and you follow the curve, and you keep following the curve.

Apply your brush
The next thing is to apply your brush and bring up an edge for those numbers since it’s doing much better chisel the edge for the skinny Latin press, flatten, and lift back up to the chisel.

Apply a wide area of lettering
The wide area of lettering is used to apply the broadest coverage of lettering possible while still maintaining a clear image. This lettering can be applied to the entire surface or just a portion.
The wide area of lettering is ideal for large areas that are not easily identifiable, such as billboards and large murals.

Cleaning up mistakes
Also, after all the steps mentioned above, it is essential to clean up all errors that might have occurred when painting; you need to clean it up o as to make it clean and good to look at.

You can clean up the mistakes by using alcohol. Alcohol is a great cleaning agent for painting as it will clean it without any traces of previous errors in your painting.
How To Paint Stripes On Wooden Letters
When you want to paint stripes on wooden letters, it is always better to start from scratch. Painting stripes on wooden letters can create a unique look and add to the charm of your front porch or porch swing. Painting them is not the hardest task ever, but it is an art that requires practice. There are many DIY ideas on making wooden letters look better, some quite original and creative.

5 Steps Involved In Painting Stripes On Wooden Letters
Step #1
Prepare the surface of your wooden letter by sanding it with fine sandpaper. This will help to give you a smoother surface to paint on. Once you have done this, you can paint over it with any colour. Be sure to use a primer first so that the colour of your paint doesn’t show through.
Step #2
Once your first coat has been applied, you should wait for it to dry before proceeding with painting stripes on top of them. This will be required if you want extra protection, such as varnish or polyurethane. Depending on how thickly coated your letter is, this may take several days for completion.
Step #3
Once all the stripes are painted on top of the wooden letters, ensure that they are completely dry before going ahead and applying any protective coating such as varnish or polyurethane. This will ensure that your letter remains strong and lasts longer than if it was left unprotected against water damage or wear and tear from everyday use by visitors in your home or business premises.
Step #4
Remove the existing paint, if any, with a paint stripper. It will be easier to apply the new paint if you remove the old paint. Also, be careful not to make the surface of the letters too wet with the stripper. If it sits on top of the wood for an extended period, it can damage it and make it harder for the paint to adhere.
Step #5
Apply primer. We recommend using one Zinsser Bulls Eye 1-2-3 Primer coat to seal any knots or porous areas in your wood letter.
With a pencil, lightly draw a baseline across your wood letter where you want your stripes to begin and end. This will allow you to create an even line across all sides of your wood letter that you can use as a reference when painting stripes with multiple colours.
Paint stripes on your wooden letters using acrylic craft paint. You can use a brush or a roller, depending on how large and flat they are. For example, if you’re painting stripes on wooden letters with small curves or angles, such as an “X” shape, using brushes is best because they can get into those areas without getting streaks in your finished product.
Wrap the tape on the wooden surface well to ensure the paint doesn’t bleed underneath the tape.
Then apply your desired stripe color to make it more adorable.
Allow the paint to dry on the surface before handling them.
How to spray paint letters on wood
A stencil is a fantastic way of adding graphical illustrations on woods, furniture, and other surfaces.
Using spray paints is the fastest way to paint your stencil. It can also make a few significant effects as it blends colours by spraying on top of each other or together. It also creates excellent results by spreading close and far away from the stencil. However, using spray paint has a disadvantage as it is hazardous to health if exposed to too much or breathed in. So it’s advisable to take the necessary precautions, like wearing a suitable and wearing right nose mask, safety eye goggles, disposable gloves, and working in a well-ventilated environment.

The following steps will guide you on how to use stencils with spray paint;
Step 1: Attach and position your stencil.
First off, spray the back of the stencil with a thin mist of a spray mount adhesive, then allow it to dry for close to 30 seconds until the stencil becomes tacky. You can also use a low-tack tape to attach the stencil to the surface, but it’s more advisable to use the spray mount to ensure that the stencil is held flat to the surface. Before using spraying paints, use paper to tape the rest of the surface to mask the surrounding areas.
Step 2: Painting
Use fast-drying and acrylic-based paints. Test spray on scrap cardboard to make sure the spray can be working correctly. I’m sure you don’t want to get stuck with a faulty spray nozzle. Before using, make sure you shake the spray can, and while painting, be careful not to spray too close to the stencil as the paint will drip under the stencil. You can spray the stencil by releasing it in short bursts, and another method is to apply the paint by sweeping the can back and forth over the stencil to make the paint settle perfectly.

Step 3: Peel the stencil
Carefully remove the papers used to cover the rest of the surface without touching the stencil. One significant fact is that you don’t have to wait for the stencil to dry before you peel it off. You can also speed up the drying process by using a hand dryer on a low medium setting.
Read Also: How Long for Paint to Dry Before Applying Polyurethane Finish?
Materials and tools needed to paint letters on wood.
- Stencil Ease
- Spray adhesive
- Paint
- Water
- Clear acrylic polyurethane finish.
- Newspaper, towel.
- Wood
- Toothpicks
- Sandpaper (100 grit & 120 – 220 grit)
- Paintbrushes
- Wood paint primer
- Acrylic paint
- Ruler
- Tape
- Spray-painting mask
- Disposable gloves
- Paint tray
- Dabber
- Cosmetic sponge.
Simple steps on how to paint letters on wood and other surfaces.
- Make sure the surface you’re stenciling is clean and smooth.
- Use repositionable spray adhesive to hold the stencil in place.
- Dab a little of the paint on a paper table.
- Gently place a cosmetic sponge in the paint to wipe off excess paint.
- Lightly dab the paint straight down onto the area you’re stenciling.
- Remove the stencil
- To fill in the stencil marks, use a toothpick, gently dip it in your paint, and then carefully use it to trace the paintbrush to fill in the stencil gaps.
Conclusion- How to paint letters on wood with stencils
Painting on wood and other surfaces is another aspect of art that inspires creativity. Apart from the beautiful designs stenciling gives, it is economical as it provides more color and life to furniture, surfaces making it look more creative, vibrant, and inspiring.
Learning how to paint wood and stenciling is a great way of creating a unique handcrafted design on any surface, including walls, wood, fabric, floor, paper, and metal.
So far, various steps, methods, and guidelines have been outlined to help anyone paint a block of wood from scratch and, at the same time, help professionals in getting more detailed information about stenciling.
Important Reads: